


Foam Background

Custom Vivarium Background Guide
How to build great looking backgrounds for vivariums & terrariums
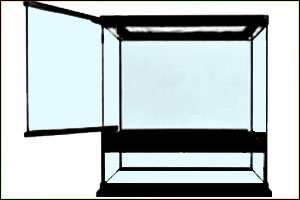

What you'll need to build your own
We stock everything you'll need to get the job done right!
Step 1: Initial Silicone Layer
This ensures the background will stick well to the glass, and also offers a good way to conceal the foam work from view
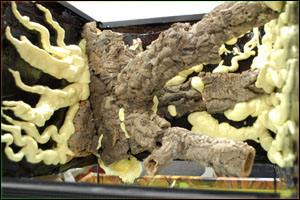
Step 2: Foam & Decor
Positioning & mounting all the decor for hardscaping
Now the fun begins. Place any pieces of vivarium safe wood, rocks, or vines onto your background to get a visual idea of what you'll be building. Once you've decided on a layout, you can lightly tack them to the background using polyurethane foam. Simply apply some foam on the underside of the pieces you'll be using (where they'll contact the silicone-covered glass panel), and set them in place. If you are using heavier decor, or don't have much surface area to attach the wood decor to the background, we suggest using an additional dab of silicone to add structural integrity to the piece. In that case, waiting 24 hours for that to cure will be necessary before proceeding with foam. Once the decor is settled into place, you can begin to foam-in around them, building as realistic of a pattern as possible. We suggest using inexpensive Great Stuff foam for this purpose.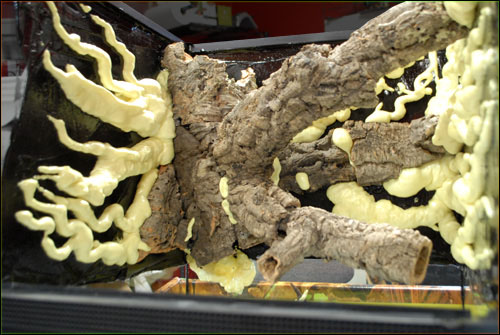 By allowing the foam to cure for about 7-10 minutes, it should actually be pliable enough for you to push, pull, and form it using your hands before further sculpting is necessary. We strongly suggest using latex gloves for this step, as polyurethane foam does not wash off. Depending on the depth of the foam, it will set & harden after about 30-60 minutes of application. Although the outside may be hard to the touch, the inside may still be very pliable. For this reason, we recommend waiting 12 hours before using a razor knife or sculpting tool to shape ledges, platforms, vines, roots, & whatever else you'd like to see into the foam. New foam sticks well to cured foam, so if you aren't happy with the initial result, you can always apply a little more to re-sculpt later. Polyurethane foam cans are generally considered "one-time-use", and we suggest finishing the foam parts of your project within 1 hour of opening a can. In the above photos, we used 5 smaller cork rounds to create that "cork tree" look, with each piece being held together with silicone. Cork bark rarely arrives looking that way, due to the way it's removed from the trees. To make a long story short, "finding the perfect cork tree" is actually more about building the perfect cork tree out of small, easy to obtain, inexpensive cork rounds + flats. In all, the above build used three cork flats, and 5 cork tubes to complete the look. Once the silicone holding the cork rounds together cured, we filled the hollow parts with foam to add rigidity, and reduce the risk of an animal getting inside a tube. A side-note relating to different foam types:
 Pond foam is an alternative option we've seen being used lately. Considering it's about 300% more expensive and gets covered with silicone & background mix anyway, we recommend (and use!) the usual Great Stuff product. Furthermore, in our experience, pond foam expands more than the standard Great Stuff foam, which makes it a little more difficult to work with.
Step 3: Silicone & Texturing
The most difficult part, and the last step before things start to look right aesthetically
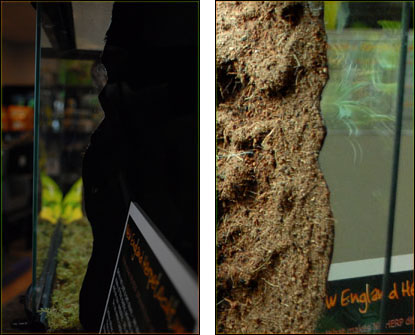
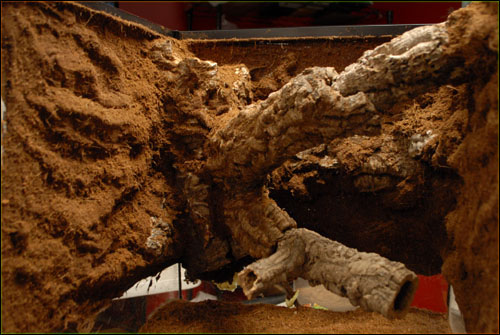 This is the most difficult step of the project, and it will require appropriate preparation for the best result. For this reason, it's critical to ensure you have everything ready to go before you begin to apply silicone. We've always urged clients to mix their own background texture substrate for the best aesthetic result. A mixture of fine-grade coconut fiber, medium-grade coconut fiber, and peat moss is an excellent choice. Since our article first went live back in 2010, we've developed our own proven Custom Background Texture Substrate that's specifically mixed for this purpose, and can provide more dimension & a better visual effect than coconut fiber would alone. Once your background mix is prepared, apply a new layer of silicone over all of the exposed existing silicone and polyurethane foam. Be sure to completely cover the foam and if you have to, add a little extra onto the edges touching your decor add-ins to be sure they look appropriately blended in. (It can easily be trimmed later if you use too much.) The silicone should completely cover all of the foam and original black silicone, and should not be applied thicker than 1/8". Here's the tricky part... After applying the silicone, there is only a 7-10 minute window to apply the background mix before the silicone begins to get tacky. Once silicone "tacks up" and begins to cure, the background mix will not stick, so it's imperative to work quickly. Working in a highly humid, warm location will help to extend the time before silicone cures, and working without fans blowing on the project will also help give you the most time possible. It can be a pain to go back and correct errors, and difficult to make corrections look perfect, so it's often best to practice before proceeding. After the silicone layer is applied, pour a bunch (more than you'll use) of the background substrate mix onto the silicone and gently, evenly press it into place. Be sure to remember where all the small details and crevices are! Allow your terrarium to sit background side face up with the Background Mix pile still on top of the drying silicone for at least an hour. (Overnight is ideal) If you've applied silicone & background texture mix to the sides & background simultaneously, don't try and remove the remaining pile(s). Waiting awhile will ensure that the silicone can hold on to as much of the texture mix as it can. Once you are confident it's mostly cured, the enclosure can be placed face-up and the texture can be gently removed. Paintbrushes work great, but gently blowing it down works well too. Once cleaned up, it should look something like the inset photo.
 Step 4: Trim Work + Touch-Ups
It's all downhill from here!
 At this point, we have what looks like the beginnings of a nice custom background, although the edges & Background Mix coating may not quite be perfect yet. From here, any missed spots with bare foam or silicone showing can be carefully touched up with a thin layer of silicone & Background Mix. As always, try to limit the silicone application thickness to 1/8" or less, to ensure it can cure quickly & completely. If any pointed edges of foam are sticking out past the silicone, they may be difficult to cover up effectively. In this case, carefully removing the edge using a crafting knife or razor will allow for a nice, flat surface. At that point, a repair of silicone + more Custom Background Mix is an easy task. Any portions of wood decor that were unintentionally covered by foam or silicone can usually be scraped & trimmed back without much effort. It's nice to avoid this step, but that's often easier said than done.
 Step 5: Custom Vivarium / Terrarium Background Completed!
Plant It, Seed It, and Enjoy!
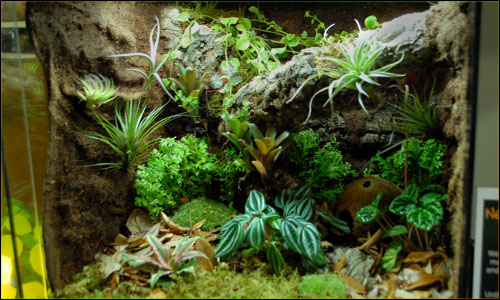
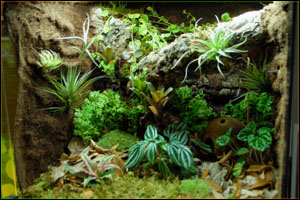
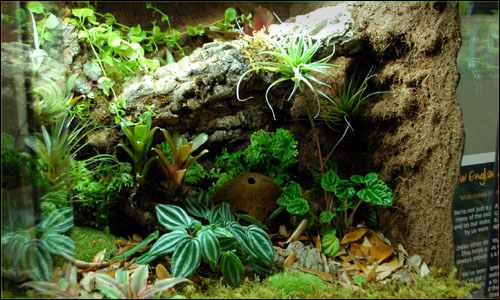 That's it! Once the custom background is completely cured, it's ready for planting & seeding! For comprehensive, step-by-step instructions on how to build a long lasting live vivarium, check out our Vivarium Construction 101 article.
 Thanks for choosing us as your vivarium info source!
We hope you'll choose us as your vivarium supply source, too! 
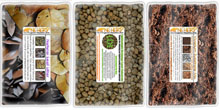
View Custom Background Kits
Vivarium-Related Kits
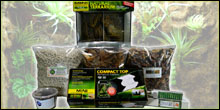


Vivarium-Related Supplies
Source: https://www.neherpetoculture.com/custombackgrounds


Tidak ada komentar:
Posting Komentar